
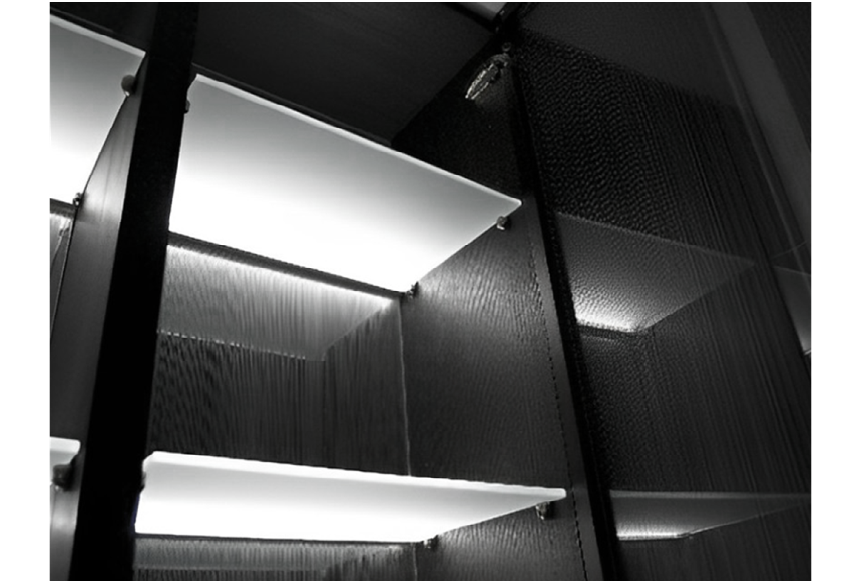
Integrating LED Lighting into Bespoke Furniture from the Design Stage
Lighting built into furniture can change how a cabinet performs. A deep wardrobe becomes easier to use, a display shelf becomes more legible and a kitchen counter gains direct illumination. The cleanest result is achieved when the light is considered alongside panel dimensions, hinges, drawers and cable routes. Installing electrical components after a cabinet is assembled often forces compromises: visible leads, awkwardly positioned switches or inaccessible power supplies. Furniture makers can avoid those problems by treating lighting as a coordinated construction detail, with a clear purpose for every illuminated compartment.
Define each cabinet’s lighting purpose
A kitchen wall cabinet, a wardrobe and a display case ask different things of their lights. The kitchen needs useful output across the worktop. The wardrobe benefits from visibility inside a vertical storage volume. A display case may need directional light that creates depth around objects without drawing attention to the emitter. One standard strip position will not serve all three equally well.
Read More: 8 Inventive Ways to Incorporate Plywood in Office Design
Review the furniture elevation and identify the surfaces that should receive light. A horizontal fitting placed beneath a shelf can emphasize the objects below; a vertical fitting near the front edge of a wardrobe can reveal clothing along its height. Set lighting goals before finalising the cabinetry, since the preferred source position affects grooves and internal structures.
Select fittings for the furniture geometry
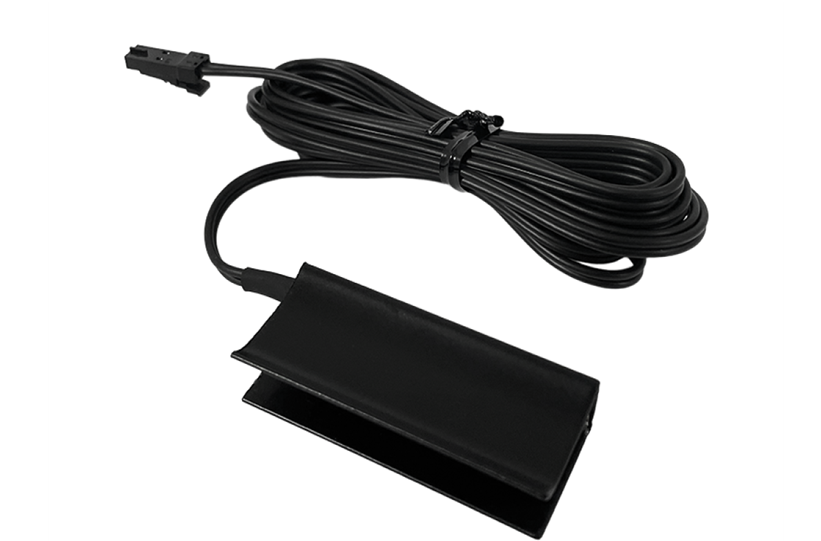
Some projects suit a continuous linear element, while others benefit from compact point lights or small fittings designed for glass shelves. Recessed installations keep the luminaire close to the panel surface, while surface-mounted products can simplify manufacturing or retrofits. Each choice affects the amount of material that must be removed, the visible edge and the available space for wiring.
The LED lighting for furniture assortment brings together different furniture-focused options for these applications. Compare products using dimensions, installation instructions, light direction and documented electrical specifications. The fitting should be selected for the cabinet’s real thickness and mounting location. A shallow shelf may not offer enough material for a deep recess, and glass requires attachment hardware intended for the panel.
Plan wiring while panels are still in production
Electrical routes are easiest to conceal before panels are assembled. Draw cable paths through side walls, behind back panels or within dedicated service channels. Check where shelf supports and hinges occupy the same space. A cable crossing a hinge line can be damaged through repeated door movement, even if it is initially hidden from view.
Provide an accessible route to the power supply and control equipment. A removable service panel or neighbouring cabinet can be preferable to trapping electronic components behind glued furniture. Where several shelves are illuminated independently, identify each branch on the drawing. Clear documentation allows installers to connect and test the furniture without guessing which lead serves each light.
Give glass shelves special attention
Glass creates striking lighting effects because an illuminated edge can become visible across the panel. The result depends on glass thickness, edge finish, transparency and the exact location of the source. A fitting intended to send light into the glass edge will behave differently from one aimed down onto products. Choose the effect before ordering hardware or designing the cabinet support system.
Mechanical support and electrical attachment must both be considered. A lighting clip should not automatically be treated as a structural shelf bracket. Verify permissible glass dimensions and loading with the support system’s manufacturer. Conceal wires within the opaque furniture frame, and make any removable panel disconnectable without pulling on fragile leads. Installation neatness is especially important because transparent shelves reveal nearby details.
Make kitchen lighting useful at the worktop
Under-cabinet lighting should reach the areas where chopping, washing and food preparation happen. A fitting close to the rear wall often emphasises the backsplash, while a location farther forward can spread more light across the working surface. The correct position depends on shelf depth, beam direction and whether the worktop has a reflective finish.
Test the light from a standing position. Avoid exposed emitters that shine directly toward the user and examine reflections from polished counters. A continuous source can provide even coverage across a row of cabinets, provided interruptions at joints and appliance spaces are considered. For kitchen use, the components and their placement should be appropriate for the local conditions, including cleaning and proximity to moisture.
Match sensors and switches to everyday movement
Furniture lighting is often most convenient when it responds to use. A wardrobe door sensor can switch on a fitting when the door opens, while a manual switch may be suitable for a display cabinet that remains illuminated through the evening. Drawers and sliding doors require careful sensor placement so their hardware does not obstruct detection. Test with the cabinet fully loaded.
Control equipment must be compatible with the voltage and connected load of the specific fittings. If several compartments form one illuminated display, decide whether they should operate together or independently. Place switches where the user naturally reaches and keep sensors out of accidental contact. The most elaborate control system is not always the one that makes furniture easiest to use.
Plan for colour and visible hardware
The same wooden cabinet looks different under warm and cool light. Warm white often complements natural timber and living spaces; neutral white may be useful for practical storage and merchandise displays. When several shelves are lit together, differences in emitted colour become conspicuous. Choose a coherent specification for the entire unit and check colour-rendering information when product appearance matters.
Read More: How to decorate your garage?
The finish of profiles, end caps and exposed light bodies also belongs in the furniture schedule. A dark aluminium channel may form a deliberate graphic edge; a matching pale channel may disappear against a white panel. Diffusers influence whether individual LED points remain visible. Review a short installed sample with the actual furniture materials before producing a large quantity of repeated cabinets.
Make servicing part of the construction detail
Furniture is cleaned, moved and reorganised over time. Lights and connections should be reachable without dismantling the entire cabinet. Use suitable connectors and enough service slack where the design permits, while keeping loose wire away from sliding mechanisms. Test every branch before fitting final panels, and confirm that diffusers or removable covers can be accessed as intended.
An integrated furniture-lighting project succeeds when the electrical components are considered as carefully as the hinges and shelf supports. The light reaches the intended object or surface, cable routes remain hidden and controls follow daily habits. With those details resolved before fabrication, the finished unit looks coherent whether the lighting is on or off.
